> ## Documentation Index
> Fetch the complete documentation index at: https://kb.snagr.co.uk/llms.txt
> Use this file to discover all available pages before exploring further.
# How to set permissions? (Issues)
Permission settings is an important topic because not only does it ensure data security but it also **defines a clear process** for your project team, which a **critical success factor** in rolling out any systems and SnagR is no exception. When everyone knows **who need to do what at when**, people adopt to new systems easier.
Before you assign permission to users, here is an important question to ask: **What is the current workflow for issue rectification?**
This helps to:
a) identify relevant users / teams who need to use SnagR
b) assign permission rights to them accordingly
In SnagR Issue Mode, these are the built-in stages:
 It is not necessary to make use of all stages. Here are examples of a simple workflow (without sign off stage):
 You can set user permissions for issue when you [add](/en/set-up-project/accounts-and-permissions-project-level/how-to-add-users-to-project) users or [edit](/it/impostazione-progetti/utenti-e-permessi-amministrazione-progetto/how-to-edit-users-and-contractors) users.
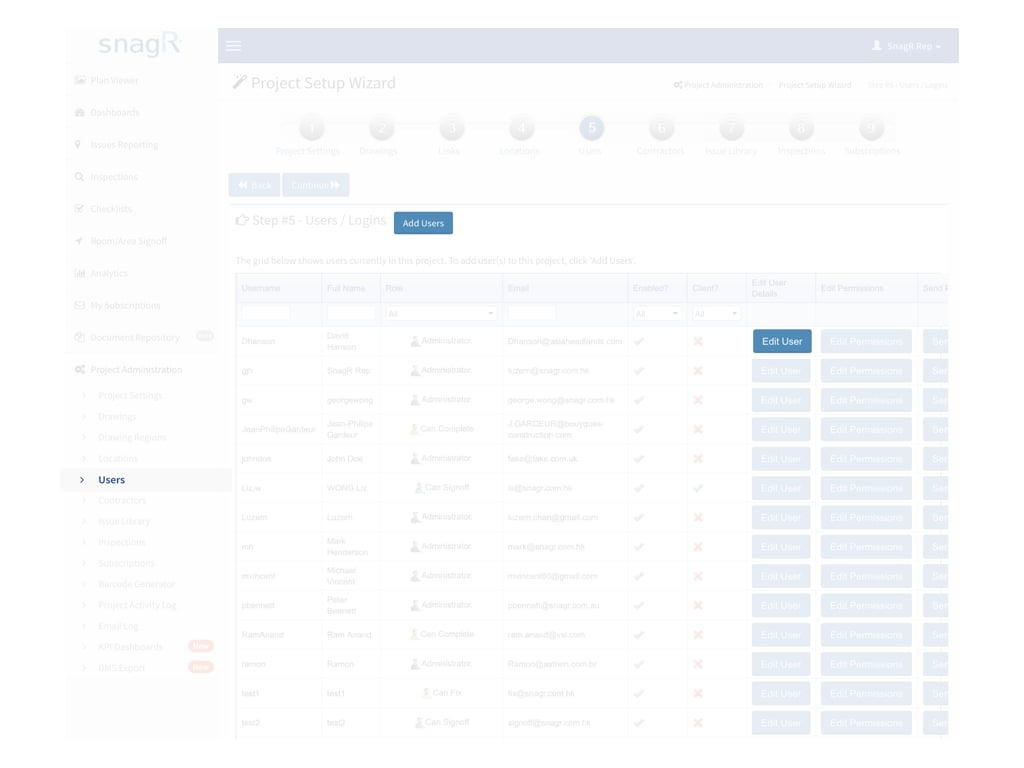 Either brings you to the page like below:
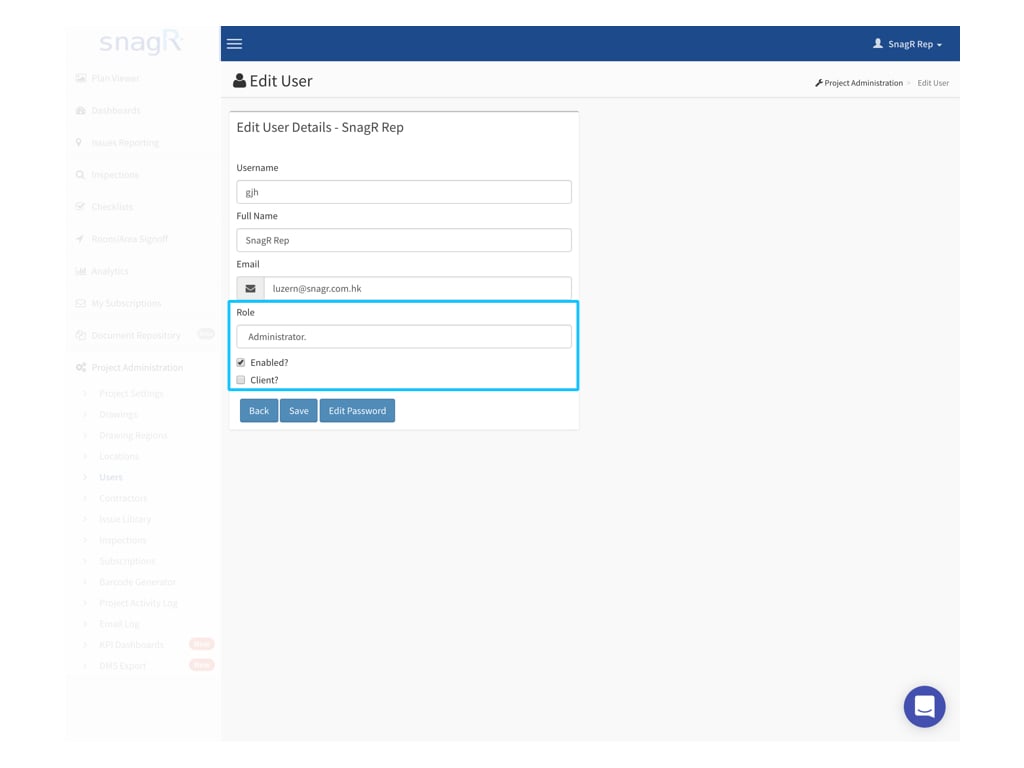 At **Role**, the permission options are as follow:
**Read-Only**
A user with Read-Only permissions, can only see the items in the system, but not edit/delete them.
**Can-Fix**
A user with Can Fix permissions, can read the items and is able to give the status "Fixed" to an issue. The issue then turns green. The user can add new issues.
**Can Sign-Off**
A user with Can Sign-Off permissions can read the items and is able to give the status "Signed off" to an issue. The issue will turn blue. The user can add new issues.
**Can Complete**
A user with Can Complete permissions can read the items and is able to close an issue. The issue will turn grey. When issues are closed it will disappear from the device (but remain searchable on website). The user can add new issues.
**Administrator**
A user with Administrator permissions is able to do everything at the project level. The user will be able to add, edit, re-open and close issues (turn issues to grey). The administrator is also able to add locations, users and subcontractors. The user is also able to switch on/off the inspections, checklists and Issues Library for the project.
*
At **Role**, the permission options are as follow:
**Read-Only**
A user with Read-Only permissions, can only see the items in the system, but not edit/delete them.
**Can-Fix**
A user with Can Fix permissions, can read the items and is able to give the status "Fixed" to an issue. The issue then turns green. The user can add new issues.
**Can Sign-Off**
A user with Can Sign-Off permissions can read the items and is able to give the status "Signed off" to an issue. The issue will turn blue. The user can add new issues.
**Can Complete**
A user with Can Complete permissions can read the items and is able to close an issue. The issue will turn grey. When issues are closed it will disappear from the device (but remain searchable on website). The user can add new issues.
**Administrator**
A user with Administrator permissions is able to do everything at the project level. The user will be able to add, edit, re-open and close issues (turn issues to grey). The administrator is also able to add locations, users and subcontractors. The user is also able to switch on/off the inspections, checklists and Issues Library for the project.
* User role will directly affect the inspection & form permission of the user, you should **never** update the user role after updated inspection/form permission.*
**Enabled**
When the user is enabled, he/she can access to the project. If the user is disabled, he/she will not be able to login to the project. Note it is not possible to delete a user but it is possible to disable a user, because deleting a user will affect the data the user has add or updated before.\
You can also change the user role to "**No Access**" for update permission.
**Client**
A Client has his own environment in the project. He can't see the other issues, only the ones he added. If the main contractor creates an issue, the client cannot see it and the main contractor will close the issue. If the client creates an issue, all users can see it but only the client user can close it. The main contractor can only update it as MC Closed (Main Contractor Closed), indicating it is ready for client approval. Below is an example workflow:
User role will directly affect the inspection & form permission of the user, you should **never** update the user role after updated inspection/form permission.*
**Enabled**
When the user is enabled, he/she can access to the project. If the user is disabled, he/she will not be able to login to the project. Note it is not possible to delete a user but it is possible to disable a user, because deleting a user will affect the data the user has add or updated before.\
You can also change the user role to "**No Access**" for update permission.
**Client**
A Client has his own environment in the project. He can't see the other issues, only the ones he added. If the main contractor creates an issue, the client cannot see it and the main contractor will close the issue. If the client creates an issue, all users can see it but only the client user can close it. The main contractor can only update it as MC Closed (Main Contractor Closed), indicating it is ready for client approval. Below is an example workflow:
 At project administration > project settings, you can enable **clients as a team**, allowing client users to see issues raised by all client users.
**Subcontractor**
A Subcontractor will only see the issue that are assigned to him. By default the permission is Can Fix (turn issues to **green**). See more on how to [add](/en/set-up-project/accounts-and-permissions-project-level/how-to-add-contractors-to-project) and [edit](/it/impostazione-progetti/utenti-e-permessi-amministrazione-progetto/how-to-edit-users-and-contractors) contractor account.
At project administration > project settings, you can enable **clients as a team**, allowing client users to see issues raised by all client users.
**Subcontractor**
A Subcontractor will only see the issue that are assigned to him. By default the permission is Can Fix (turn issues to **green**). See more on how to [add](/en/set-up-project/accounts-and-permissions-project-level/how-to-add-contractors-to-project) and [edit](/it/impostazione-progetti/utenti-e-permessi-amministrazione-progetto/how-to-edit-users-and-contractors) contractor account.
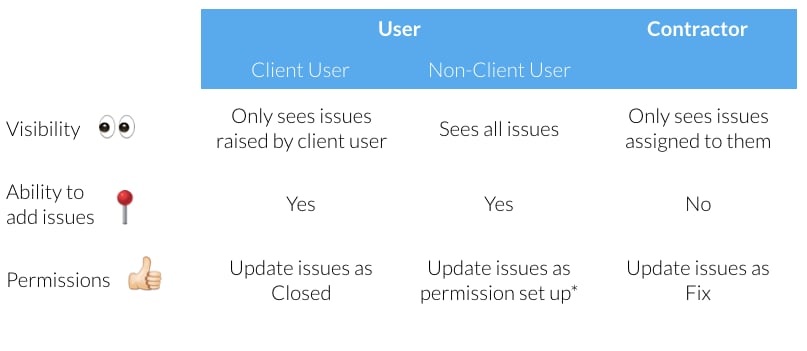 In addition to it, you can also control the permission of the Issue Types for who will be able to interact the specify Issue Types by this way:
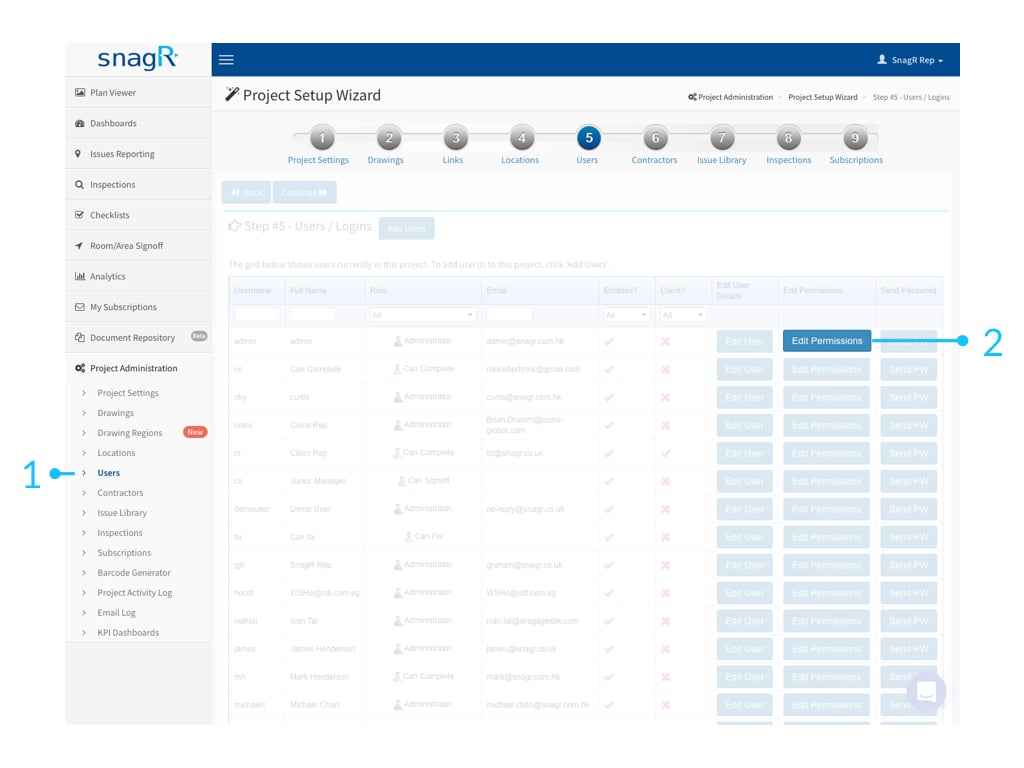 "Project Administration" > "Users" > Select user and click "Edit Permissions"
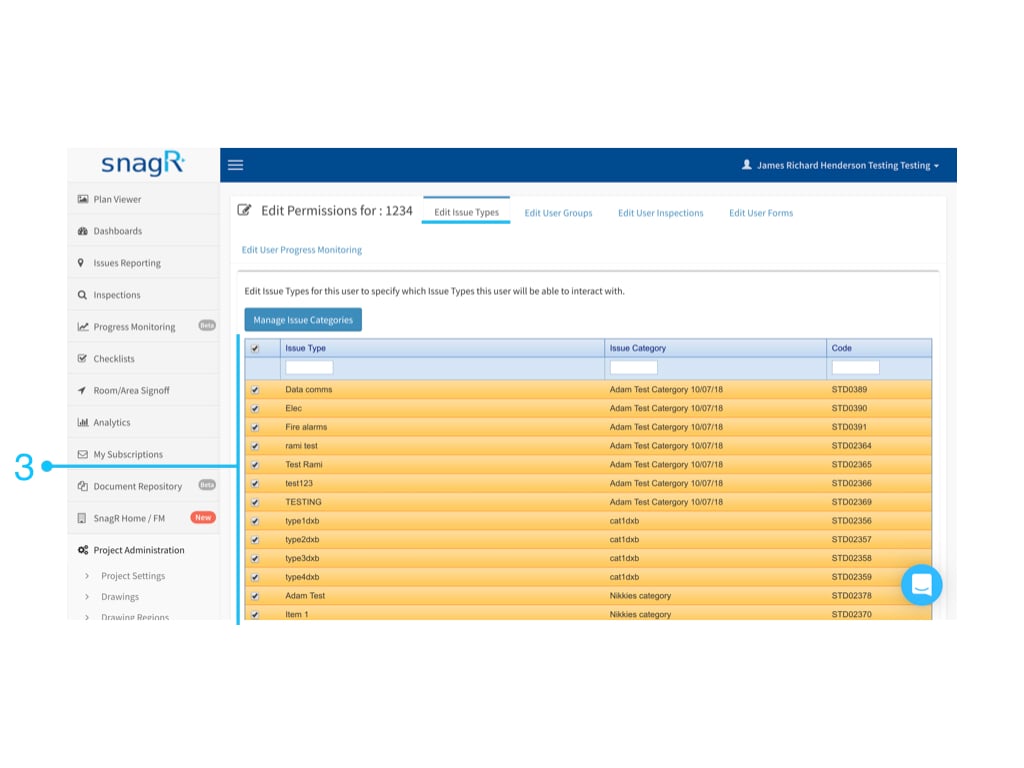 Now you are able to control which issue(s) need to disable for this user by Issue Type at the "Edit Issue Types".
Or
Now you are able to control which issue(s) need to disable for this user by Issue Type at the "Edit Issue Types".
Or
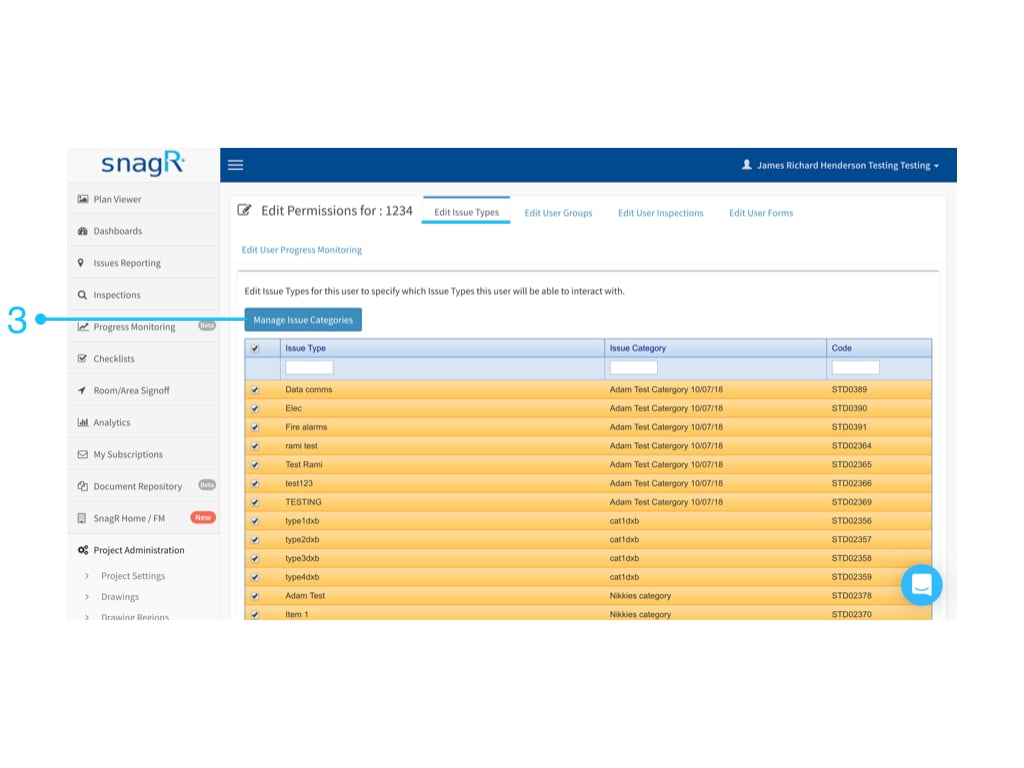
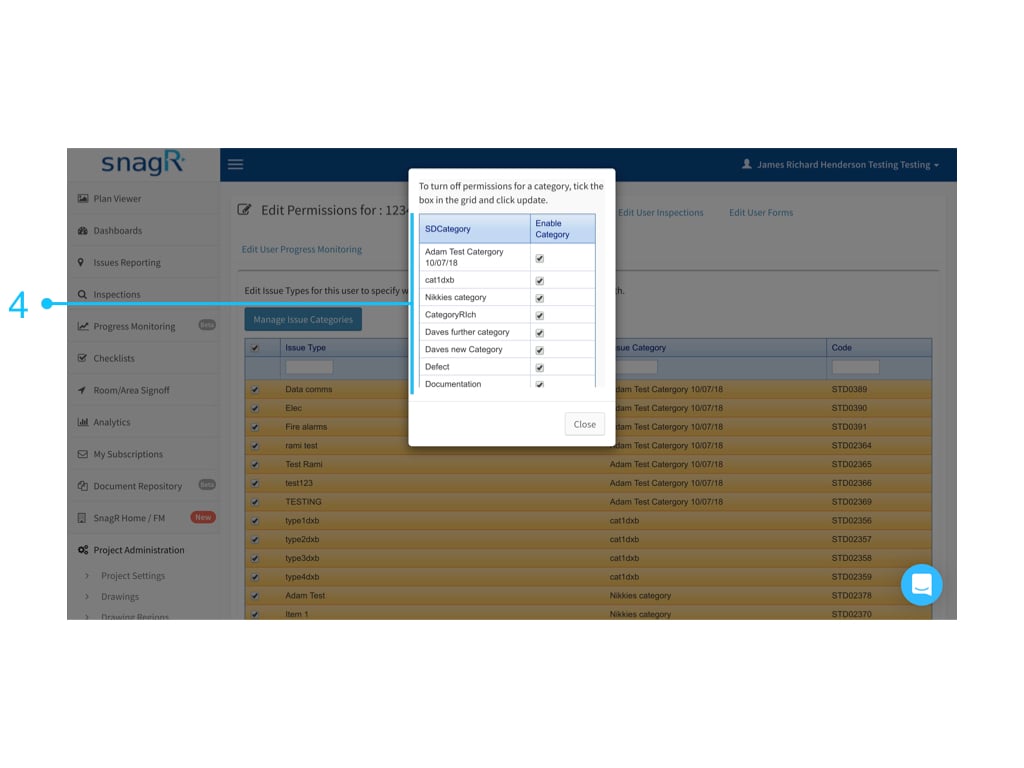 You can also manage it by Issus Categories.
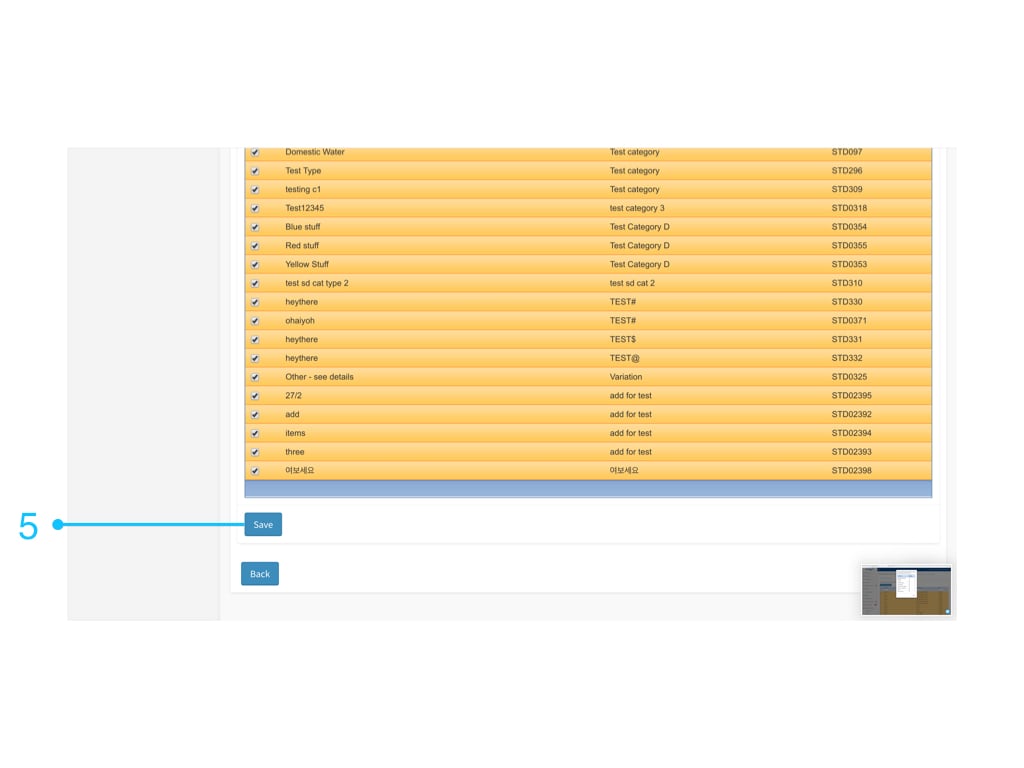 Remember to click "Save" to update charges.